Archived Build a Blog Site with Next.js and Firebase Part 3 - Reading Each Post
Archived
🚨 ATTENTION 🚨
You are currently viewing an archived post. The information here may no longer be accurate or maybe Ashlee just decided not to publish the post as publicly anymore.
Welcome to the third post in my new “Build a Blog Site with Next.js and Firebase” series! This series is pretty similar to a series I wrote in 2019: “Build a React & Firebase Blog Site”. Because it’s been well over a year since I published that series, I decided to create a new series and use the Next.js React framework this time. It’s a fun framework to use, and I know so many people that are curious about it. I hope you enjoy the series!
- Read Part 1 of the series
- Read Part 2 of the series
- Read Part 4 of the series
- Read Part 5 of the series
Create a Page Component for Each Post
In the site we’ve been building together, there currently isn’t a way for people to read posts individually. We have the home page, which lists all blog posts, and we have a page for creating new posts. The good news is that we can handle rendering individual posts on their own pages pretty easily with Next.js Dynamic Routes. We just need to make sure we name the file correctly. Let’s create a page component that just displays the slug from the URL as a test.
- Add
post.module.scssunder thestylesdirectory:
.PostPage {
  img {
    max-width: 100%;
    border-radius: 12px;
    border: 1px solid black;
  }

  h1 {
    margin-top: 20px;
    margin-bottom: 8px;
  }

  a {
    display: block;
    padding: 8px;
    color: black;
  }
}
- Add a
postdirectory topages - Add
[slug].jsunder thepostdirectory:
import { useRouter } from 'next/router';
import styles from '@styles/post.module.scss';

const PostPage = () => {
  const router = useRouter();
  const { slug } = router.query;

  return (
    <div className={styles.PostPage}>
      <h1>Hello, from post: {slug}!</h1>
    </div>
  );
};

export default PostPage;
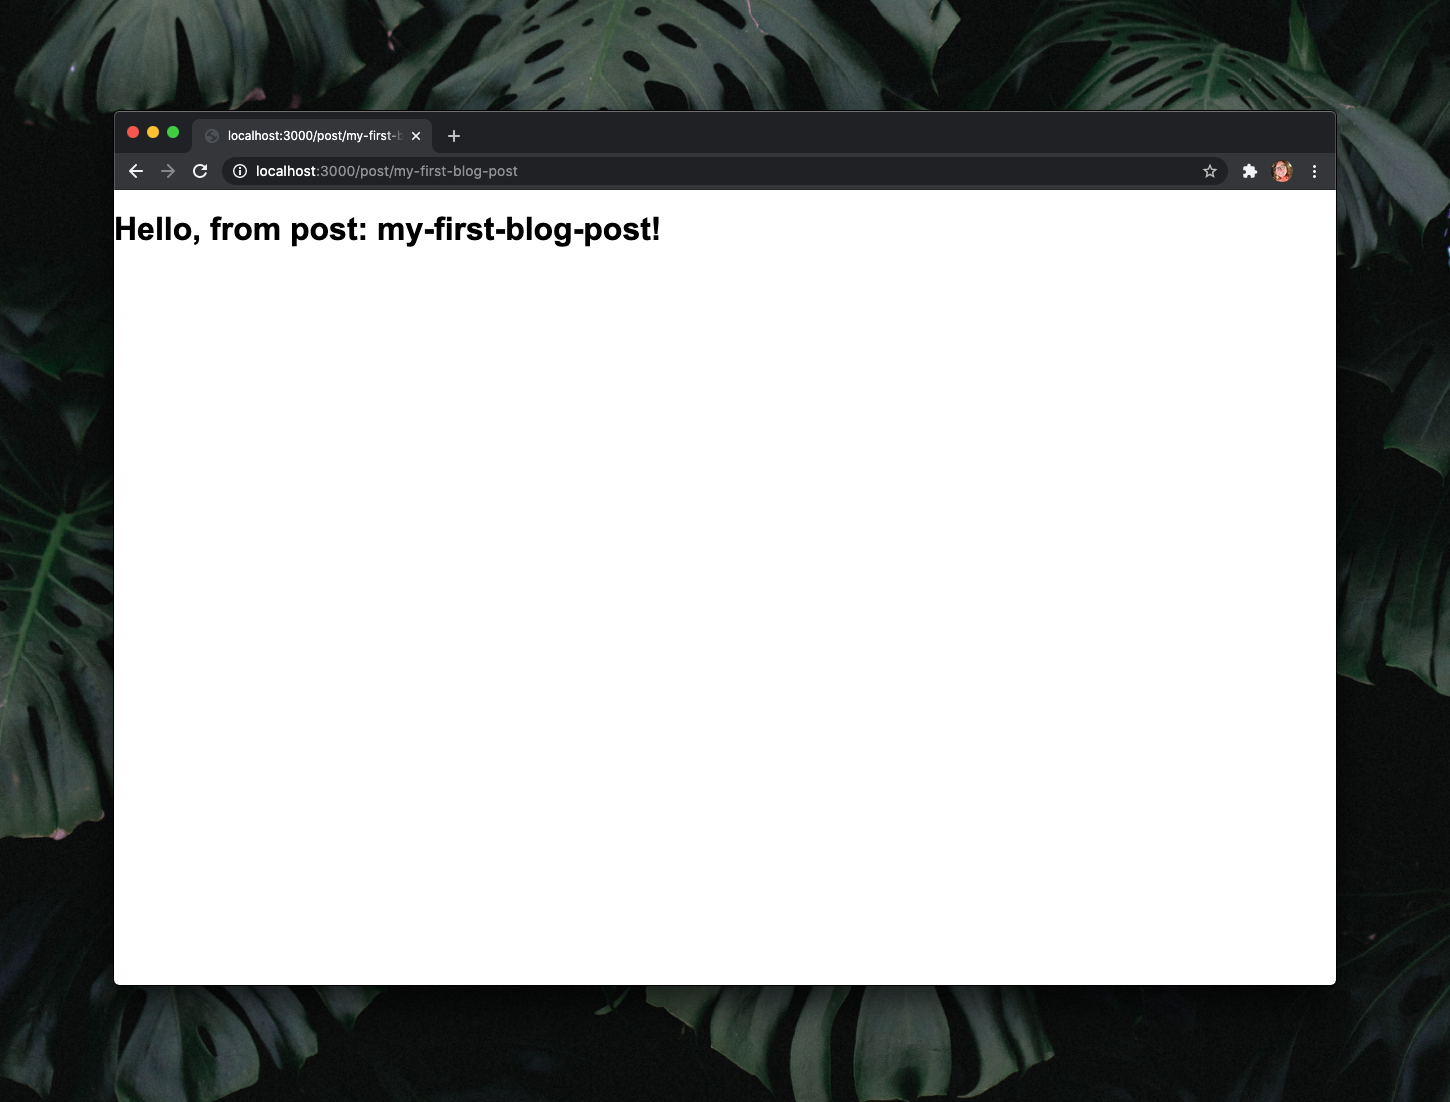
- Go to
https://localhost:3000/post/my-first-blog-postin your browser - The page should look something like this:
- Commit and push your work to your repository:
git add .
git commit -m "Adding basic PostPage component"
git push
Link to Each Post on the Home Page
Now that we have the pages for each post dynamically generating, we can link to them on the home page.
- In
pages/index.js, add this<a>element below the<p>where you setdangerouslySetInnerHTMLwith the post content:
<a href={`/post/${post.slug}`}>Continue Reading</a>
- In
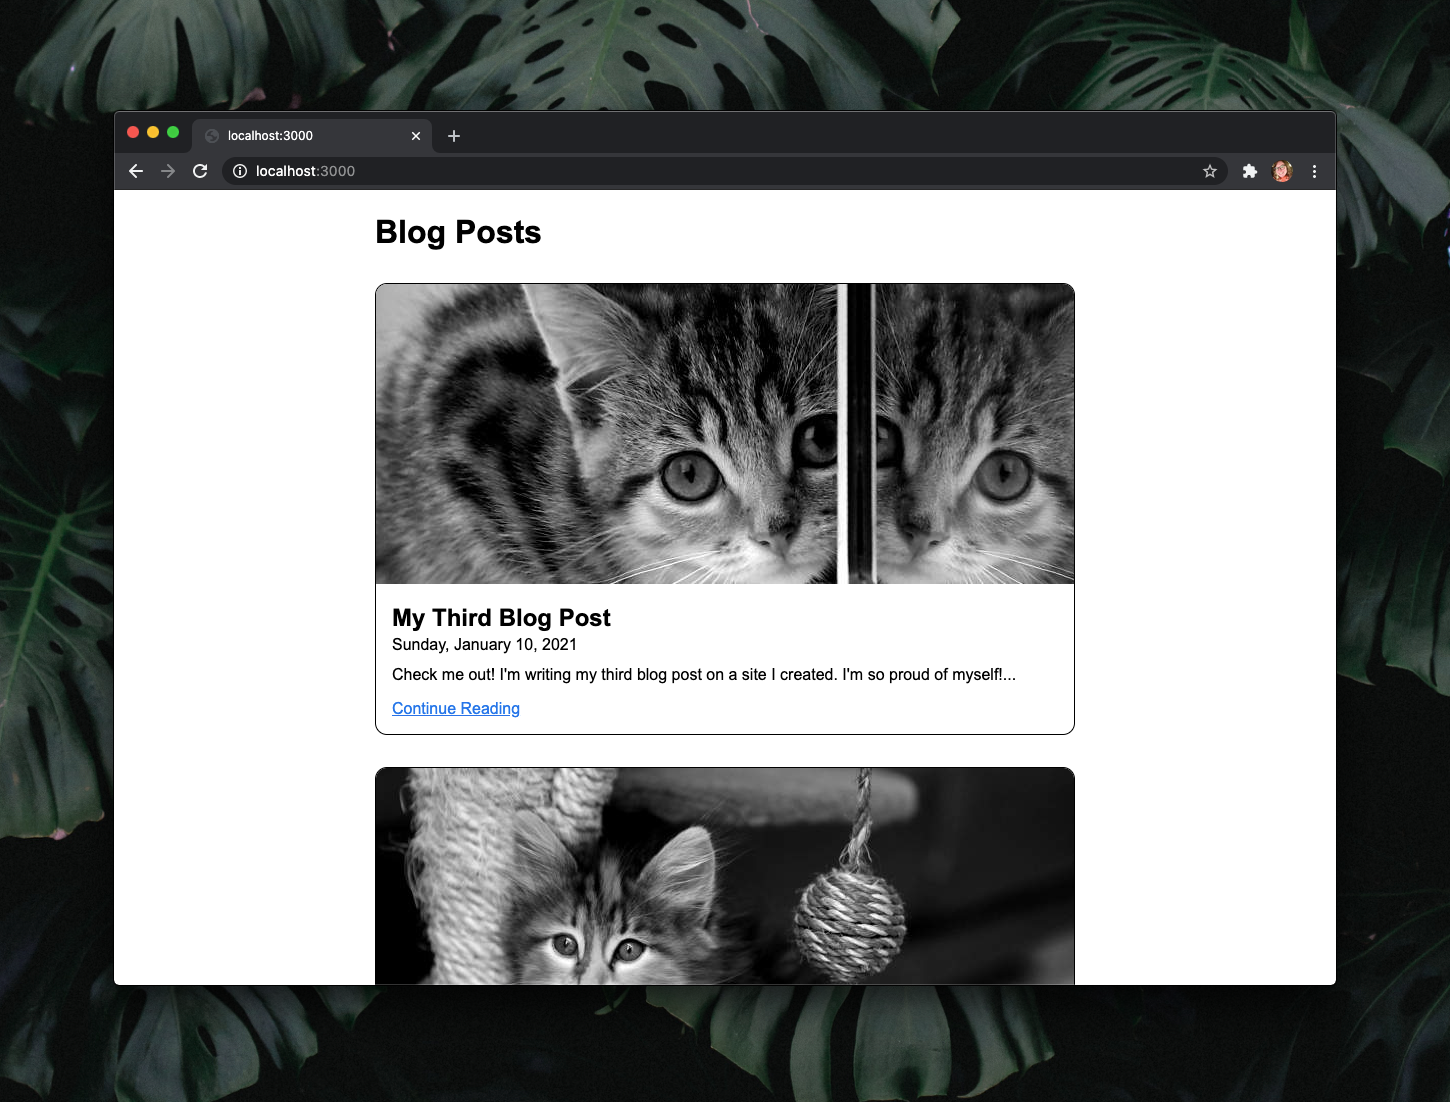
styles/index.module.scss, addmargin-bottom: 16px;to thepelement. - Below that style, add one for the
athat sets thecolorto#1a73e8. - The home page should now look something like this:
- Commit and push your work to your repository:
git add .
git commit -m "Adding links to each post"
git push
Load and Render Posts by Slug
Our PostPage component doesn’t do much yet, so let’s take care of that now. We’ll need to add a function for getting a post’s details from our Firebase Realtime Database and then update the PostPage component to render those details nicely.
- Add a new
getPostBySlugfunction tolib/firebase.jsfor getting the post from our Firebase Realtime Database:
/*
Retrieves the data for a single post from a given slug.
*/
export const getPostBySlug = async (slug) => {
  initFirebase();

  return await firebase
    .database()
    .ref(`/posts/${slug}`)
    .once('value')
    .then((snapshot) => snapshot.val());
};
- Import
getPostBySlugat the top ofpages/post/[slug].js(you can remove theuseRouterimport):
import { getPostBySlug } from '@lib/firebase';
- Right before
export default PostPage, addgetServerSidePropstopages/post/[slug].js.
export async function getServerSideProps(context) {
  const post = await getPostBySlug(context.query.slug);

  return {
    props: {
      post,
    },
  };
}
- Update the
PostPagecomponent to accept apostprop and render the post:
const PostPage = ({ post }) => (
  <div className={styles.PostPage}>
    <img src={post.coverImage} alt={post.coverImageAlt} />
    <h1>{post.title}</h1>
    <span>Published {getFormattedDate(post.dateCreated)}</span>
    <p dangerouslySetInnerHTML={{ __html: post.content }}></p>
  </div>
);
PostPageuses the samegetFormattedDatefunction as the home page, so let’s add autils.jsfile under thelibdirectory and export the function from there. You will have to restart you development server after this step if it’s running.
export const getFormattedDate = (milliseconds) => {
  const formatOptions = {
    weekday: 'long',
    month: 'long',
    day: 'numeric',
    year: 'numeric',
    timeZone: 'UTC',
  };
  const date = new Date(milliseconds);
  return date.toLocaleDateString(undefined, formatOptions);
};
- Import
getFormattedDatein bothpages/index.jsandpages/post/[slug].js:
import { getFormattedDate } from '@lib/utils';
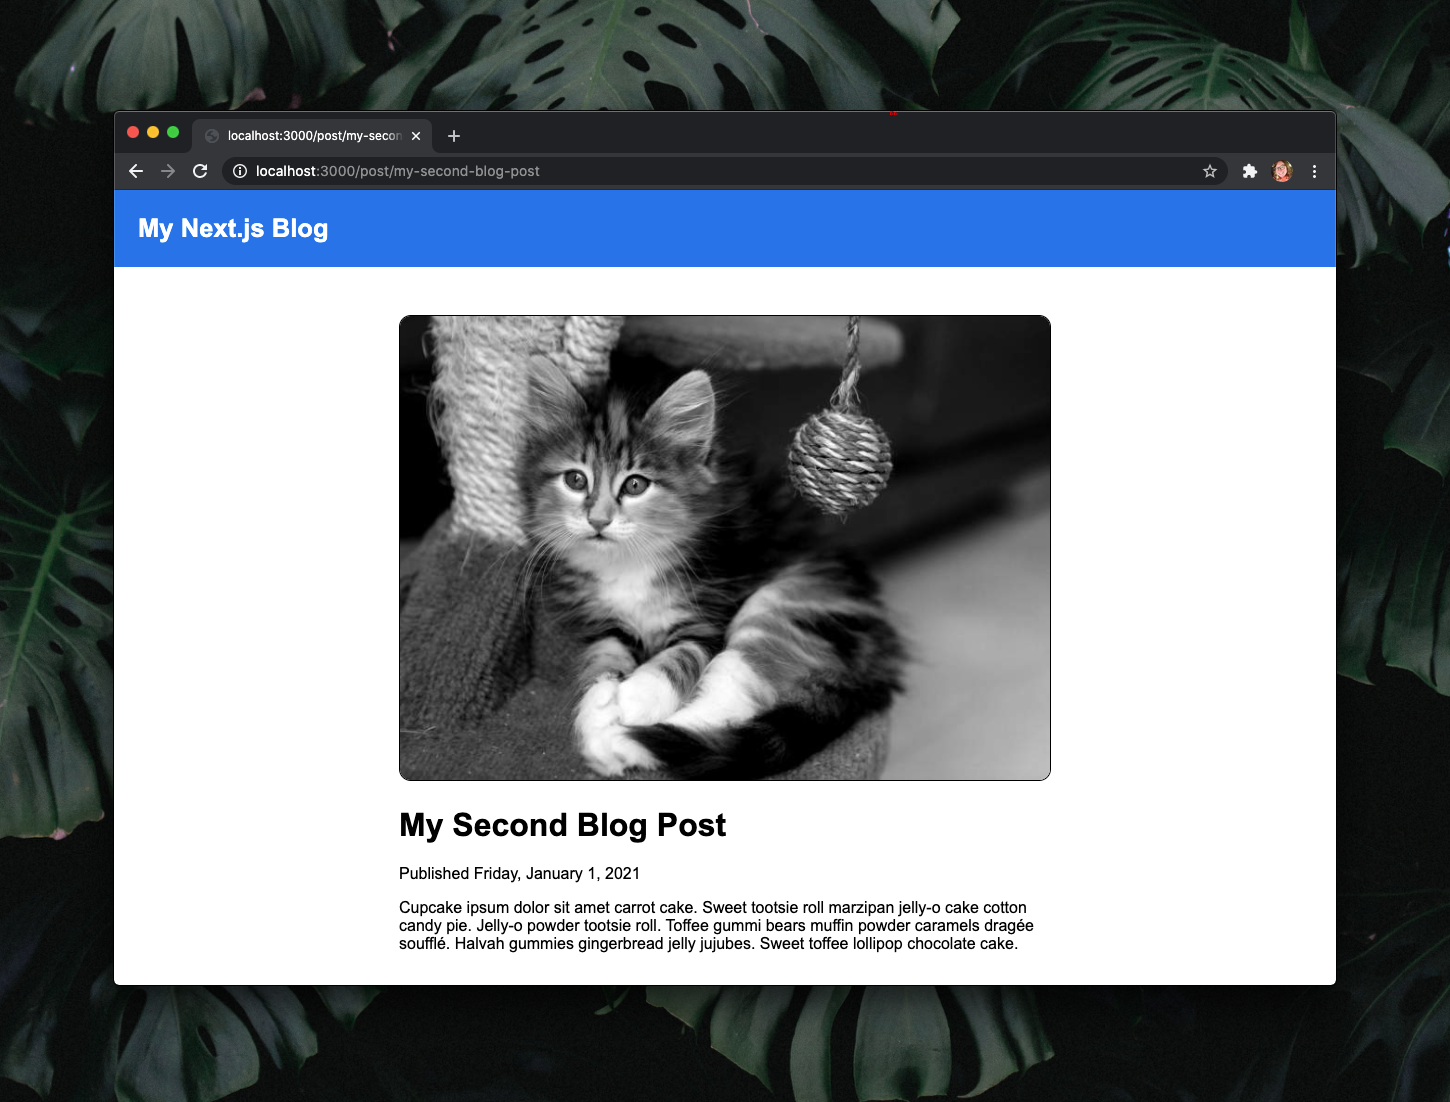
- If you go to
http://localhost:3000/post/my-second-blog-postin your browser, the page should look like this:

- Commit and push your work to your repository:
git add .
git commit -m "Rendering posts in PostPage"
git push
Add Site Navigation and Semantic HTML
Add a Layout component
We’ve got our post pages, but now we need a way to navigate back to the home page! We also want the navigation to look the same on each page, so let’s make a component for it that’ll also help us consolidate some page styles.
- Add a
componentsdirectory at the root of your project. - Update
jsconfig.jsonfor the newcomponentsdirectory:
{
  "compilerOptions": {
    "baseUrl": "./",
    "paths": {
      "@components": ["components"],
      "@lib/*": ["lib/*"],
      "@styles/*": ["styles/*"]
    }
  }
}
- Add an
index.jsfile for exporting all components from the directory. - Add a
Layoutdirectory under thecomponentsdirectory. - Add
Layout.jsxtocomponents/Layout:
const Layout = ({ children }) => <div>{children}</div>;

export default Layout;
- Update
components/index.jsto export Layout:
export { default as Layout } from './Layout/Layout';
- Import
Layoutintopages/post/[slug].js:
import { Layout } from '@components';
- Update
PostPageso that the rendered contents are wrapped by the newLayoutcomponent:
const PostPage = ({ post }) => (
  <Layout>
    <div className={styles.PostPage}>
      <img src={post.coverImage} alt={post.coverImageAlt} />
      <h1>{post.title}</h1>
      <span>Published {getFormattedDate(post.dateCreated)}</span>
      <p dangerouslySetInnerHTML={{ __html: post.content }}></p>
    </div>
  </Layout>
);
- Restart your development server if it’s running.
- If you go to
http://localhost:3000/post/my-second-blog-postin your browser, the page should still look like this:
- Commit and push your work to your repository:
git add .
git commit -m "Adding new Layout component"
git push
Add HTML landmarks to Layout
- Add
Layout.module.scsstocomponents/Layout:
.Layout {
  nav {
    padding: 24px;
    background-color: #1a73e8;

    span {
      a {
        font-size: 1.6rem;
        font-weight: bold;
        color: white;
        text-decoration: none;

        &:hover {
          text-decoration: underline;
        }
      }
    }
  }

  main {
    padding: 24px;
  }
}
- Import the styles in
components/Layout/Layout.jsx:
import styles from './Layout.module.scss';
- Add a
classNameto the<div>inLayoutand add two elements:<nav>and<main>.
const Layout = ({ children }) => (
  <div className={styles.Layout}>
    <nav>
      <span>
        <a href="/">My Next.js Blog</a>
      </span>
    </nav>
    <main>{children}</main>
  </div>
);
- Go to
https://localhost:3000/post/my-second-blog-postin your browser. - It should look something like this and you should be able to go to the home page with the new link at the top:
- Commit and push your work to your repository:
git add .
git commit -m "Adding nav and link to home page to Layout"
git push
Consolidate Page Styles
Take a look styles in index.module.scss, create.module.scss, and post.module.scss. You should notice that all three of them have the same max-width, margin, and padding CSS properties set and the same values for each. This will be one benefit of having a Layout component: It helps you consolidate your styles and avoid repetition.
It also allows you to make styling changes accross all of your pages at once. For example, if you wanted to make the main content of your site narrower, you could update max-width in this one place to do so. Let’s remove these three properties from index.module.scss, create.module.scss, and post.module.scss and use the new Layout component on these pages.
- Import
Layoutinpages/index.jsandpages/create.js:
import { Layout } from '@components';
- Wrap the rendered content in
pages/index.jsandpages/create.jswith the opening and closingLayouttags. - Delete the
max-width,margin, andpaddingfromindex.module.scss,create.module.scss, andpost.module.scss. - Update the
mainstyles incomponents/Layout/Layout.module.scssto handlemax-width,margin, andpaddingfor page content:
main {
  max-width: 700px;
  margin: 0 auto;
  padding: 24px;
}
- All of your pages should have the same blue naviation bar at the top now.
- Commit and push your work to your repository:
git add .
git commit -m "Using Layout in all pages and consolidating styles"
git push
One last thing
What if someone tries to go to a post that doesn’t exist? Let’s try it. Go to https://localhost:3000/post/abcdefg in your browser. You should see a Server Error error that says "Cannot read property 'coverImage' of null". This is because the PostPage component is expecting its post prop to be defined. Since the post isn’t found in the database, our getPostBySlug is returning null. So, the post object passed to PostPage is null and doesn’t have any attributes we can access off of it.
- Import
useRouteragain in thePostPagecomponent and check to see ifpostis defined. Redirect to/404if the post doesn’t exist.
const PostPage = ({ post }) => {
  const router = useRouter();

  if (!post) {
    router.push('/404');
    return;
  }

  return (
    <Layout>
      <div className={styles.PostPage}>
        <img src={post.coverImage} alt={post.coverImageAlt} />
        <h1>{post.title}</h1>
        <span>Published {getFormattedDate(post.dateCreated)}</span>
        <p dangerouslySetInnerHTML={{ __html: post.content }}></p>
      </div>
    </Layout>
  );
};
Uh oh! There’s another Server Error: “No router instance found. you should only use “next/router” inside the client side of your app.” This is happening because this code is running on the server side of our app and the router.push method is not supported there. You can read more about it at the link mentioned in the error.
- To fix it, let’s add an additional check to our
ifstatement:
if (!post && typeof window !== 'undefined') {
  router.push('/404');
  return;
}
If we run this, we still get a Server Error: “Cannot read property ‘coverImage’ of null”. The if statement we just added is mainly for the client-side and doesn’t tell the server-side what to do if the post object is undefined.
- Add one more
ifstatement below the first one that just returnsnullifpostisn’t defined.
const PostPage = ({ post }) => {
  const router = useRouter();

  if (!post) {
    router.push('/404');
    return;
  }

  if (!post) {
    return null;
  }

  return (
    <Layout>
      <div className={styles.PostPage}>
        <img src={post.coverImage} alt={post.coverImageAlt} />
        <h1>{post.title}</h1>
        <span>Published {getFormattedDate(post.dateCreated)}</span>
        <p dangerouslySetInnerHTML={{ __html: post.content }}></p>
      </div>
    </Layout>
  );
};
- Check that you’re redirected to a 404 page.
- Commit and push your work to your repository:
git add .
git commit -m "Redirecting to 404 if post doesn't exist"
git push
- Celebrate!!! You did it!!! 🎉